Change Language :
Linear guide rails
What are linear motion systems?
Linear motion systems are a combination of linear guides, rails, drives and controllers which is ideal for building systems for single or multi axis movement. The modular design allows individual configuration, using high-quality system components, and enabling tailored linear solutions for specific application requirements. Replacing conventional recirculating ball systems with sliding technology can also reduce operating costs, improve reliability, and deliver smooth, low-wear motion, all with extended service life.
igus linear guides are lubrication-free allowing the guide rails to operate entirely dry, eliminating the need for external lubrication. This ensures a maintenance-free performance. The absence of grease or oil also increases resistance to contamination from dust, dirt and debris, making the system suitable for both harsh or sensitive environments. Low-noise operation is achieved through the use of engineered polymer high-performance sliding elements and an optimised rail–carriage geometry, which reduces vibration and stick–slip tendencies. Service life can be accurately calculated using online configuration tools, all based on application-specific parameters such as load, speed, and duty cycle. For systems configured using the tool, a 4 year guarantee is offered.
The modular design allows individual configuration using high-quality system components, enabling tailored linear solutions for specific application requirements. Replacing conventional recirculating ball systems with sliding technology can also reduce operating costs, improve reliability, and deliver smooth, low-wear motion, all with extended service life.
Sliding linear vs rolling linear
| Feature | Sliding linear system | Rolling linear system |
|---|---|---|
| Friction | Higher than recirculating ball bearings | Low |
| Precision | Application dependent but generally lower than rolling systems | Very high precision is possible |
| Cost | Generally lower | Generally higher |
| Weight | Lower weight due to the plain bearings being used on lower weight materials such as Aluminium | Traditional rolling systems tend to higher |
| Lubrication | Zero lubrication | Needs lubrication |
| Contamination | Tolerant | Sensitive |
Types of linear guides


How to choose the right linear guide?
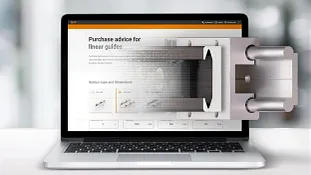
We know that it can be confusing when trying to pick the best linear system for your application so we have designed an online tool to take the stress out of your decision.
Your advantages with drylin® linear slides and guides

Robust
drylin telescopic rails withstand high temperatures, strong vibrations and more

Dirt-resistant
Even in sand, swarf and dust, drylin linear guides can be used

Corrosion-free
Corrosion-free and media-resistant, for use under water

Quiet
About four times quieter than corresponding linear bearings made of metal

Lightweight
Up to 75% lighter thanks to high-performance polymers

Hygienic
All systems operate without additional lubrication and are therefore very clean

Compact
We offer various linear rails and guides ideal for small installation spaces

Precise
For precision movement, the drylin range is ideal.
Examples of live applications using linear guide rails


Frequently asked questions about linear guide rails
Linear motion is motion going in a straight line. It can be created but using linear slides. Mechanical linear motion is often required in applications such as printers, camera sliders, textile machinery and more. Linear slides are used in these types of applications everyday.
Linear guides are mechanical components designed to facilitate smooth, precise movement along a straight path. It's a key part of many motion systems in automation, manufacturing, and robotics.
A system is linear if it follows the principles of superposition and scaling—meaning the output is directly proportional to the input. If the system includes elements like squared terms, trigonometric functions, or variable multiplication, it’s likely nonlinear.
Linear rails are mechanical components used to guide and support motion in a straight line with high precision and low friction. They're commonly found in industrial machinery, automation systems, CNC machines, 3D printers, and robotics.
Installing linear motion guides requires precision and care to ensure smooth and accurate movement. Here’s a general step-by-step guide:
- Prepare the mounting surface
Ensure the surface is clean, flat, and rigid. Any unevenness can affect performance. - Align the rails
Position the linear rails according to your design. Use alignment tools or jigs to ensure they are perfectly parallel. - Secure the rails
Fasten the rails using the recommended screws or bolts. Tighten gradually and evenly to avoid misalignment. - Install the carriages (Blocks)
Slide the carriages onto the rails carefully. Avoid forcing them, as this can damage the bearings. - Check for smooth motion
Move the carriage along the rail to check for smooth, consistent motion. If there’s resistance or binding, recheck alignment. - Final calibration
If the system is part of a machine, perform final calibration and testing to ensure accuracy.
Choosing the right linear guide depends on your application’s specific requirements. Here are the key factors to consider:
- Load capacity
Determine the weight and forces the guide needs to support. Heavier loads require stronger guides with higher load ratings. - Precision and accuracy
For high-precision tasks (e.g., CNC machining or medical devices), choose guides with minimal deflection and high repeatability. - Speed and acceleration
If your system moves quickly or accelerates rapidly, select guides designed for high-speed performance. - Travel length
Ensure the guide rail is long enough to accommodate the full range of motion needed in your application. - Environment
Consider exposure to dust, moisture, chemicals, or extreme temperatures. Some guides offer protective seals or corrosion-resistant materials. - Mounting and space constraints
Check the available space and mounting options. Compact or low-profile guides may be better for tight installations.
Consulting
I look forward to answering your questions

igus Australia1300 726 244Write e-mail
Shipping and consultation
In person:
Monday to Friday from 8 am - 5 pm.